1. I really enjoyed Danni's Show N'Tell about Prosthetics for animals. As we all know, I am a huge animal lover. I did not only choose her Show N'Tell for the sole purpose that I love animals, but how prosthetics can be used for animals as well. Her project made me think back to my animals, who are very old and have a difficult time walking. Prosthetics can not only be used to replace a body part, but can also be added to aid an animal, or a person, therefore her project was relatable for myself.
It was crucial for me to know that prosthetics go beyond the human body and they can help other things on this planet. It effected my understanding of course materials by realizing that prosthetics can go beyond our imagination and can do some pretty incredible things. Especially with 3D printing, there should be no limit to what you can do or what you can create.
It may influence my future teaching because I want to provide that positive and uplifting tone in my classroom environment. I want students to be realistic, but to also know if you can put your mind towards something; you can do anything.
I also really enjoyed Kaitlyn's Show N'Tell about how prosthetics can be turned into art. Her project make me think about how whenever someone would get a cast, family and friends would always want to draw or sign their casts to show support and make it prettier to look at! I think this concept can definitely be applied to the world of prosthetics and I am happy that is has been. People should not look at prosthetics as a negative thing, but should bring light to it and her research has proved that.
2. "The reconceptualization of art education asks, 'what can be created of what we have been conditioned to be?' - by routine and by omission." -Carpenter and Tavin, 2010
This specific quote stood out to me when I was reading this curriculum studies handbook because I have never really heard of the term 'reconceptualization' and I wanted to further my knowledge about that, especially when it comes to the art classroom. To me, this quote is not very positive and I think education, especially art education, is quite the opposite. This quote to me means that creating art and art education is nothing but a routine. Is this really true? God I really hope not.
I understand reconceptualization and how it is constantly moving forward with what is happing in todays society. Ideas are constantly evolving and growing and we need to keep up with the ever-changing times. To me, reconceptualization is re-doing or re-working certain concepts and ideas to aid in the development of what is occurring today and how we can make certain ideas better.
I also enjoy how they touched on community-based learning because I incorporate that into my final lesson plan! When they introduced community-based learning, I really tried to incorporate it into my studies at this institution and how I can incorporate this concept into my education. I want students to reflect on their communities and the environment around them and how this has aided them in their learning processes.
In the article by Bequette and Bequette entitled "A Place for Art and Design Education in the STEM Conversation", it stated that adding art to traditional STEM curriculum thinking could "weaken each discipline and confuse the boundaries between different approaches".
This quotation really stood out to me because I completely disagree with it and it did not aid in my learning in this class. It has showed me different opinions that people have about this topic, but it made me angry to be quite honest. I think adding art to STEM with only strengthen all of these disciplines and vary the types of leaning. Adding different disciplines to each is almost offering students a different way to think about concepts and problems.
Especially art, art can be applied to everything. By this article, it has shown me some opinions about art in the classroom and digital technology. Some people do not believe in this and that is okay, that is their personal opinion. Personally, wanting to be a future educator I am trying to see it from both sides. I can see how boundaries between different approaches and disciplines can be blurry if art is added, but look at what adding art to STEM can do. It can strengthen relationships between these different areas and offer more opportunities and different solutions.
3. The project cluster that had the greatest impact on my understanding of what it means to learn in a Digital Visual Culture was the final project cluster. Creating an interactive app based around a map was something that I never thought I would have to do. Especially in todays society, each and everything you do is based around technology. Especially us college students, we are all attached to our smartphones and we are constantly utilizing different apps for different things. I think the point of technology is to access information and communicate with others via the quickest and easiest way. This is especially evident through smartphones, and the fact that we created a prototype to aid in this communication as well as seeing others was an incredible experience.
With this specific project, I have learned several things I would want to bring to my classroom as well as some things I would not when it comes to curriculum and the 21st century student. For example, we all were not very excited about working with a group, let alone from a completely different practice from us, for our final project. I think students today would much rather work on projects themselves, than with a group and especially from another class. I do admire how there were different group roles because this provided a sense of structure and balance within the group. We were able to successfully complete all tasks and still be able to help the others in our group without stepping any boundaries.
Thursday, May 14, 2015
Monday, May 4, 2015
Learning in the Digital Visual Cultures Reflection
Well this class has been a whirlwind.
I took this class because I wanted to make myself more knowledgeable about how to incorporate technology in the classroom.
I definitely learned how to do this and what some good topics to include are, however it was not so easy to accomplish this.
Overall, this semester I was very distracted and this took a great toll on my academics. I am an extremely hard worker, however this semester really was a challenging one, especially with all of my art education courses.
Some of my favorite things about the class:
3D Printing
Listening to different Show N'Tells
The final project - working with a different class with different students and coming together
Aaron let me re-do several projects, he was easy to communicate with and understanding
The course was very structured, especially all of the different projects and the requirements
Some of my least-favorite things:
This blog, I can see how it is great for planning and reflecting, however it was just another small task I had to complete that I thought was tedious
I had to re-do my show N'tell at the worst possible time
I was very distracted
I wish we had more time to learn and prepare ourselves for 3D Printing, that whole process was very overwhelming
A lot of students did not enjoy engaging with another class for the final project. However, I beg to differ. My group worked extremely well together and I am excited to see the end result of our LGBTQ* project. We communicated with each other, had a positive attitude, got assignments and tasks done and on time and overall worked extremely well together. We were able to stay on track and accomplish all tasks.
Overall, this class was very overwhelming. In the end, I appreciate what I learned and I only hope to incorporate it in a classroom. Since I was not very familiar with the material, it was a challenge and it took me a few tries to really understand the prompts and assignments.
Thursday, April 30, 2015
LGBTQ* Connect
My group and I have made great progress in our project within the past few weeks. Last week, we sent out a survey. Here are our survey and questions:
1. Do you identify within the LGBQT* community?
2. Do you find it difficult to find information on the LGBQT* community? If so, what would you be interested in learning about?
3. Are you a part of any clubs on campus that are within the LGBQT* community? If so, which?
4. Do you attend any events that are thrown by any of those clubs? If so, about how many do you attend a semester?
5. Would you be interested in using an app that would allow you to see all events thrown by LGBQT* clubs?
6. Do you think you would attend more of these events if that app existed?
Survey summary:
30/56 people identified as LGBTQ* 56%
Most people said they did not find it hard to find information on the LGBTQ* community, yet they still responded that they wanted an app!
Some suggestions we received from the survey:
support groups, events on and off campus, appropriate terms, the acronyms, HIV testing, AIDS, STI/STD, ace spectrum, transgender, pride events, bringing awareness, micro-aggressions by straight people, activist movements, events lectures
TRANSaction - most common event held once a year
85% of people we interviewed were interested in using the app
All students who said they identified with the LGBTQ* community said they would utilize this app and attend more events
We received great results and that will really aid us in the creation of this app and achieving this goal.
Overall, the group has worked together extremely well also. Our group dynamic is on point, we all communicate and get done what we need too!
As project manager, I also had to create a powerpoint. Here are some stills below:


Monday, April 27, 2015
For my second Show N'Tell I am focussing on the website and mobile app Pinterest. You can access Pinterest on any computer as well as mobile device.
Pinterest is a free, visual discovery tool that shares photos. You can create "boards" that have certain themes, and you can search for images and photographs that can go under each board. Pinterest was launched in March 2010 by a group of entrepreneurs. For example, Art crit, aephi, LITDVC, 3D printing, landscapes, puppies, etc. You do need to register to use this site.
1. Who uses Pinterest?
2. Have any of you used Pinterest in your classes? If so, what classes?
3. Did you think using Pinterest in those classes helped your knowledge and understanding of what was being asked?
Why, yes you can use Pinterest in the classroom. My art criticism professor Jessica Poser asked us to engage with Pinterest on the first day of class. She has us search for an image that left an impression on us, and to pin that and several other images. She wanted us to keep up with it for the rest of the semester, but I personally did not because it was something extra to do, and my particular image and choice was not interesting to me.
You can search for ANYTHING, even 3D PRINTING, LESSON PLANS, STEM AND STEAM! WOW!
Search:
3D Printing
Art
STEAM
Lesson Plans
Pinterest can be used for:
lesson plans
craft ideas
images to draw/paint from
visual inspiration and ideas
looking up articles
4. Could you use this in an art classroom? Would you?
https://www.youtube.com/watch?v=evf58qH_O1Y - This is a cute, little video from a teacher who uses pinterest to look for visual ideas to incorporate in her classroom!
Thursday, April 23, 2015
Show and tell #1
Here is my first Show and Tell, which did not fully relate to the prompt so I have to re-do it, but here was my original one!
For me, I chose to do this topic because it is all about learning a brand new language through the inclusion of technology,whether that be through a smartphone, ipad, Mac, computer, etc.
For me, I chose to do this topic because it is all about learning a brand new language through the inclusion of technology,whether that be through a smartphone, ipad, Mac, computer, etc.
Rosetta Stone Language Learning is a computer-assisted language learning (CALL) software published by the Rosetta Stone. The software uses images, text, sound, and video to teach words and grammar by using repetition.
This program offers over 30 languages, including Spanish (Latin America/ Spain), English (British/English), Arabic, Latin, Korean, Japanese, German, Greek, Polish, Russian and Swahili.
1. Who has heard of the Rosetta stone?
2. Has anyone ever used the Rosetta stone?
The students pair sound or text to one of the images. The sound or text is from a native speaker of that specific language.
There are matching exercises and writing exercises.
Also, if the student has a microphone, the program can judge their pronunciation.
The aim is to help whoever wants to learn the language
On the website, it says Rosetta stone for you, classrooms and enterprise so it has already been brought to the attention of the public school system. They have an option for k-12 and higher education.
Each lesson concludes with a review of the content in that lesson, and each unit concludes with a milestone, which is a simulated conversation that includes the content of the unit.
CD-Rom, Download, Subscription
Rosetta Stone’s Discover Languages is an app currently only available on Xbox One. It is very different from the traditional design, involving a virtual world and more of a focus on games in order to appeal more strongly to game playing audiences. The only language currently supported are English and Spanish.
3. What do you think is the most popular language studied through the rosetta stone?
Top 6 languages: spanish, french, english, italian, german, japanese
4. Do you think using this software program could be beneficial to use in school systems to teach languages?
5. Why do you think this language program will be beneficial/detrimental to use?
Quotes:
Abby and Mark (Spanish)
“Repetitive”
”Fell asleep” in middle school
“Learned the basics from the website”
“I learned more Spanish from talking to people”
"It was really helpful, by giving pictures and situations that pertained to the culture you were learning the language of" - Alex
Sources:
Collaborative Group Project
For our final project, we are doing a collaborative group project with a Graphic Design class. Our group has decided to focus on the LGBTQ* community on the SUNY New Paltz campus, and the events and resources present to build a stronger sense of community, a sense of awareness and to educate people about this specific community.
We started by dividing the roles in the group:
Then, we answered 3 basic questions that professors wanted us to focus on:
We are creating an App that is based around a SUNY New Paltz campus map. This map will show different buildings on campus and the different events and resources that are located within them. For example, different resources include Gender Neutral housing and bathrooms in the Residence Halls, Oasis Haven, The Heath and Counseling Center, different majors and minors, such as Women's Gender and Sexuality and more. One of the major events that educate and support this community is TRANSaction which occurs once a year and is put on by Residence life.
I am very excited about this project, and we have received a lot of positive feedback as well!
Being the "mayor of New Paltz", I am a very sociable and friendly person and I was easily able to send out the survey to many friends here at SUNY New Paltz. We received great feedback that we will be able to use in our studies for this project.
Some feedback we received included some topics that people wanted to see on this campus:
I will post next week to show some images and the progress we made! I am to post pictures of the graphics and designs, storyboards, etc.
Have a great weekend!
We started by dividing the roles in the group:
Project Manager- Nicole
Content Producer- Dan
User Experience - Rachel
Researcher- Lilli Then, we answered 3 basic questions that professors wanted us to focus on:
1. Inquiry:
- There is not enough awareness for the LGBQT* community.
2. Audience:
- Members of the LGBQT* community, and those who are interested to learn about this community.
3. Outcome:
- Bring people together and offer a comfortable environment
We are creating an App that is based around a SUNY New Paltz campus map. This map will show different buildings on campus and the different events and resources that are located within them. For example, different resources include Gender Neutral housing and bathrooms in the Residence Halls, Oasis Haven, The Heath and Counseling Center, different majors and minors, such as Women's Gender and Sexuality and more. One of the major events that educate and support this community is TRANSaction which occurs once a year and is put on by Residence life.
I am very excited about this project, and we have received a lot of positive feedback as well!
Being the "mayor of New Paltz", I am a very sociable and friendly person and I was easily able to send out the survey to many friends here at SUNY New Paltz. We received great feedback that we will be able to use in our studies for this project.
Some feedback we received included some topics that people wanted to see on this campus:
support groups
events on and off campus
appropriate terms
the acronyms
HIV testing
pride events
bringing awareness
micro-aggressions by straight people
activist movementsI will post next week to show some images and the progress we made! I am to post pictures of the graphics and designs, storyboards, etc.
Have a great weekend!
Thursday, April 16, 2015
Final 3D Printing Prototype
Today we had our final critique for our 3D printed prototype and I could not be happier with the end result!
There were some things about my project that I actually changed from my original plan. Instead of the problem being the person had no fingers, I changed the problem to the person only having 1 finger and needing to open paint, ink, a bottle, etc. I re-printed my prototype for the third time and here are some images of it in the end:


My 3D printed prosthetic was successful in opening ink and paint, as well as my water bottle. Here is an image of that below:


There were some things about my project that I actually changed from my original plan. Instead of the problem being the person had no fingers, I changed the problem to the person only having 1 finger and needing to open paint, ink, a bottle, etc. I re-printed my prototype for the third time and here are some images of it in the end:
My 3D printed prosthetic was successful in opening ink and paint, as well as my water bottle. Here is an image of that below:
This photograph demonstrates my progression of ideas and how the prototypes have changed over the duration of the last few weeks:
Overall, I was very happy and satisfied with my final prototype. It took a lot of determination and strength, especially in the beginning of the project. I kept getting discouraged because I still was not understanding the project and my designs were just unrealistic. However, I kept re-visiting my design and making improvements and I believe that it showed in the end product! 3D printing was a challenge but something that I do hope to continue in the future.
Enjoy a lovely video from Nickelodeons Dora the Explorer singing "We did it!", which describes how I felt once my prosthetic worked and I was finally successful in my design :)
Monday, April 13, 2015
My second prototype
I went back to the drawing board and re-designed my prototype from the original model that I created.
1. I made the prototype significantly smaller because the original was way too big.
2. I also made the ledge from the opener extend out further to be more effective in opening bottles such as ink and paint.
3. I had to make the supports stronger in order to support different weights and pressures being applied to the prototype.
The orange is the original prototype and the pink one is the one I made smaller:


In the image on the right, you can see how I altered the size of the prototype to be much smaller to better accommodate a hand. Here is the new prototype below:


1. I made the prototype significantly smaller because the original was way too big.
2. I also made the ledge from the opener extend out further to be more effective in opening bottles such as ink and paint.
3. I had to make the supports stronger in order to support different weights and pressures being applied to the prototype.
The orange is the original prototype and the pink one is the one I made smaller:

In the image on the right, you can see how I altered the size of the prototype to be much smaller to better accommodate a hand. Here is the new prototype below:
WELL THEN. First, as I was walking up the stairs to go to class the prototype actually broke in my hands. I knew I needed to make the walls more supportive. However, the bottom part of my prototype broke off, and it could still be helpful and effective without it. As I was opening my water bottle using the prosthetic, the top opener actually flew off. Therefore, my original prosthetic was actually now in 3 separate pieces. I knew that I had to make the supports stronger and more supportive to support any art item being opened. Here is an image of all 3 pieces below:
On the left is the lower part of the finger piece, with the main part of the finger in the center and the broken off opener on the left side of the image. I went back into tinkercad and:
1. Added more supports under the opener
2. Made the finger much smaller overall
3. Got rid of some of the ledge that I originally added because it was a tad too big than what I would of liked.
I truly enjoyed going through this process and learned what worked and what did not work. I liked creating an original design and printing it several times because these obstacles allowed for growth in the end. I was determined to create a prosthetic to open bottles of paint and ink, and I am still determined to create one, it just needed practice and refining. Lets hope prototype 3 will work and will be just what I originally planned!
Tuesday, April 7, 2015
3D Printing for Dummies part 2
So it has taken me a little while to really grasp the idea of this project. I am trying not to get discouraged because I am determined to successfully print a prosthetic. I changed my design and problem quite a lot from what I originally wanted to do.
I started new and fresh and returned to my notes.
1. I decided that I wanted to make a prosthetic to help open bottles of ink, paint, etc. because that was a common problem students were having.
2. I created a prosthetic pointer finger with a tool attached to it to flick open a container. I found that the pointer finger was key in opening containers.
3. I also am attaching, using string or velcro, a piece to go around the wrist so that the prosthetic is comfortable for whomever is wearing it. That part is on the right, while the actual prosthetic is on the left side. I downloaded the wrist part from thingiverse.
Here it is:
I am a very driven person and I am determined to make this prosthetic work! I am excited to see this printed, and then to potentially make more revisions. Below, on the right side, is my original prosthetic that was not practical enough to 3D print:
This could not 3D print because I did not connect the pieces properly. It was frustrating because I kept trying to successfully come up with a design and just nothing was working. Again, I am trying not to get discouraged and I believe I found a solution. I think that wrist piece will be very successful, especially when making the prosthetic comfortable.
Everyone wish me luck! I hope that this is successful!
Thursday, April 2, 2015
3D Printing for Dummies
For the past few days, we have been working to create a prosthetic using Tinkercad, Thingiverse and then eventually the 3D printers. Well, the first round did not go so well for yours truly. My original idea was to create a prosthetic that would open a jar or even a jar of paint. However, after talking with Aaron I came to the realization that my idea was not really practicle and did not make sense. I tend to make things very difficult for myself and I realized I had to take a step back and change my plan. DUH. Here was my original idea:
https://www.tinkercad.com/things/7NcwEkTes0l-smooth-blorr-amberis/edit
WHAT EVEN IS THAT.
I am going to stick with my original idea of opening something, whether it be paint, a drink, ink, etc. This time, I am going to focus more on the fingers and maybe have a circular shape attached to the finger to be placed around circular objects. However, there still are challenges to that because the circle has to adjust to go around different objects, etc. Back to the drawing board!
Thursday, March 12, 2015
Blind Ink Drawings
Today in class, we conducted a very memorable experiment. There were 4 stations with printmaking, painting, ink and oil pastels at each station. You needed to create a piece of artwork using each of those tools, however you needed to take down 4/5 of your fingers, leaving 1 finger on each hand free and this finger could not be your thumb. This exercise taught us that not every individual has all limbs that the rest of us have, and this taught us what it was like to be in their shoes. It was a very memorable exercise because it taught me to problem solve and work with what I was given. I was given a series of materials and 2 fingers, therefore I would create a piece of artwork using that.
I went home and painting a series of gestural drawings using one of my favorite mediums; ink and several paint brushes. I (attempted) to paint a portrait, a dog and a flower. I say attempted, because I took away my sight and I was blindfolded while creating these pictures. It was very difficult because I am not used to not looking at my artwork while I am creating it. My process is photographed below:


This was very difficult to do and I was very tempted to look at the pictures while I was creating them! I actually did something very similar to this when I took classes at FIT in NYC a few summers ago. I had to draw a picture without looking at the piece of paper.
Below are my completed drawings:

Portrait

Dog

Flower
Here are some videos of me below drawing these pictures with ink:
Thursday, February 26, 2015
Demonstrations for Dummies
We have been doing a lot of work in class about demonstrations, and I have learned a lot about what to do and what not to do during a demonstration. The basic definition of a demonstration is the action or process of showing something and how to do it. There can be demonstrations on almost anything.
Especially on the website that we all know and love, Youtube, there are thousands of demonstrations that are good and some that are even absolutely terrible.
Here I will include a video of a demonstration and say what was done well and what could of been done better.
Good demonstrations have:
- lots of video footage
- still images
- voice overs
-transitions
- music
-outside research
- exploration
- explaining what to do, not just showing it
Not so good demonstrations:
-do not have a good balance between video footage and still life photos
- do not explain whatever is being demonstrated
- are silent
- have awkward angles
- are shaky
Overall this video was a good demonstration. I loved the inclusion of the music, and how on the side of the screen there were captions of what to do. This made the video very interesting to watch and easy to follow. However, it would of been more realistic and personal if the artist was actually painting the portrait right in front of us. I also wish that there were more voice overs of us actually hearing the artists voice. Again, this would of been more beneficial because the video would of been more personal. The artist does have a youtube channel with slower tutorials with voice overs, but I think they would have been beneficial in this specific demonstration.
This brings up a question, is there a different between a demonstration and a tutorial? Maybe I will research this for another blog!
Monday, February 23, 2015
Demonstrations
Today in class we discussed demonstrations in a classroom. I have already done my demonstration video, however, after this discussion I decided to go back into my demonstration and edit it to make my thoughts more clear and concise.
One video I included is entitled "The Science of Happiness". This video is a demonstration that deals with a project typically done with the practice of Art Therapy. This project deals with how colors can relate to emotions and how to portray that in a piece of artwork. I actually did this project and the end result is shown below:

Things to consider when putting on a demonstration:
Questions - engaging the students, having them speculate with you
Terms and words - make sure you put them in context
Gathering all of your materials
You might need to record your demo more than once
Detail shots
One video I included is entitled "The Science of Happiness". This video is a demonstration that deals with a project typically done with the practice of Art Therapy. This project deals with how colors can relate to emotions and how to portray that in a piece of artwork. I actually did this project and the end result is shown below:
Things to consider when putting on a demonstration:
Questions - engaging the students, having them speculate with you
Terms and words - make sure you put them in context
Gathering all of your materials
You might need to record your demo more than once
Detail shots
Thursday, February 19, 2015
As a result of talking about copyright and appropriation, it got me thinking about not only different artists, but how this is applied to art education.
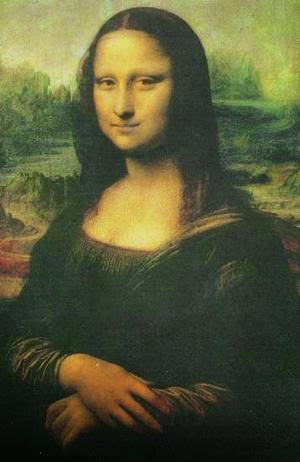

An artist that stood out to me who appropriates artwork in Marcel Duchamp. One of his most renown pieces of art is L.H.O.O.Q (1919) which is a Ready Made of the Mona Lisa.
A ready made is a piece of artwork that is slightly changed in order for it to be called that artists own. The object or painting is typically already made, the artist just has their own artistic license to change an element about it to make it their own.
This has to do with appropriation because appropriating a piece of artwork is copying or taking a piece of artwork, however you are slightly changing it and altering it to make it your own.
A question arose about how copyright and appropriation work when it comes to Education. If you are using something for specific reasons such as Education or even a Parody, that is fair use. This question came up because last semester for a lesson plan, I needed to find materials to assess student artwork. I chose a rubric and I found it online. I took that rubric and matched it with my project and altered some elements, would this be copyright or appropriation? What do you think?
While talking about documentaries, the first thing I thought of was Netflix. Netflix is full of different documentaries on topics from History to Animals to Food to Traveling to Money. One documentary that stuck out to me was called Discover Planet Ocean (which I have actually watched several times).

In this documentary, Josh Duhamel narrates the story of a team of cinematographers as they travel through the ocean to study the bond and relationships between underwater sea creatures and humanity.
I love animal science and animal research and this documentary was one that really stood out to me.
Hi everyone!
So this week we focussed a lot on copyrighting and ideas immediately started flowing in my head. Newspaper articles and documentaries started popping up of issues with technology, social media, privacy and censorship.
For this blogpost, I decided to focus on iPhones. More specifically, the iPhone 5s and 6 and how it has a fingerprint scanner in the phone. The fingerprint scanner is how you can unlock your iPhone.
Initially, society thought this was an incredible and mindblowing utility. However as time went on, this utility tapped into our security and privacy.
Below is an article I discovered on the Huffington Post about the iPhone 5s and 6 fingerprint scanner and how that scanner can result in you being hacked. Read more here.
Thursday, January 22, 2015
Technology or nah?
Hi everyone! I'm Nicole/ Nic/Nicky B whatever your preference is. I am an Art Education Major with a minor in Spanish from Long Island. I am a camp counselor for 6th and 7th grade girls. My technology usage is pretty typical. I know how to use a smartphone very well, however there are still things I am learning every day.
What technology I know versus the technology that I don't know!
I know how to utilize:
-a smartphone
 -various apple products
(iphone, ipad, mac, ipod, etc.)
-a laptop
-basic gaming consoles
-televisions
-basic graphic design skills
-cameras
Technology that scares me include:
-graphic design
-3D Printers
-those big and fancy cameras
What technology I know versus the technology that I don't know!
I know how to utilize:
-a smartphone
(iphone, ipad, mac, ipod, etc.)
-a laptop
-basic gaming consoles
-televisions
-basic graphic design skills
-cameras
Technology that scares me include:
-graphic design
-3D Printers
-those big and fancy cameras
Subscribe to:
Comments (Atom)